 Welcome to Olli Ella!


What's better than Holdie Furniture? Custom Holdie Furniture, of course! We've teamed up with Lindsay, embroidery extraordinaire, to teach you how to create this fun, floral and downright fabulous set of custom Holdie Bedding. Don't forget to follow Lindsay on Instagram for more beautiful creations.
~-
 01You will Need
Embroidery thread, an embroidery needle, scissors and a pencil if you'd like to start off by drawing your designs. -
 02Starting Your Design
For this project we decided to create a cute cactus! These are the colours we chose but you can use whatever colours your heart desires! -
 03Draw and Thread
If you wish, draw your design onto the fabric as a guide. Thread your needle, then insert the needle from the back and leave a long tail of thread that you can weave in later. This is how we hide it at the end. Make sure you poke your needle through at the edge of the shape, not the centre. -
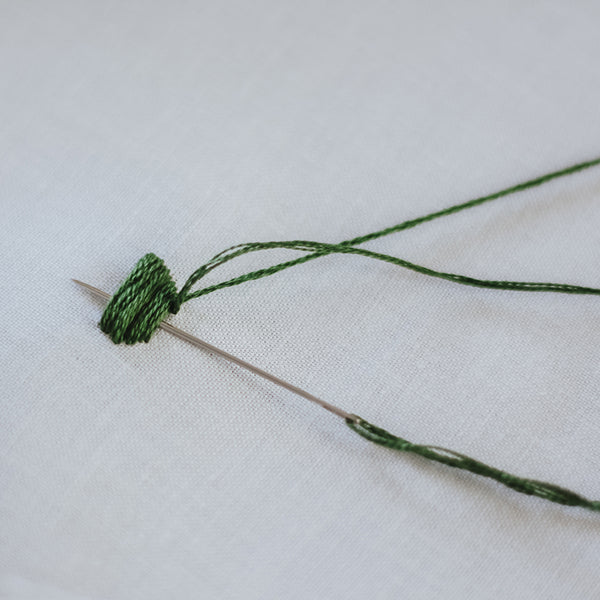
 04Satin Stitch
Now you can begin the Satin Stitch. This stitch is used to fill in large spaces, and it's super simple! First, re-insert the needle directly across from the last exit point. We want to start by stitching across the centre of the shape and working towards the end. -
 05Stitch Across
Start the next stitch directly across from, and a teeny bit beside the end of the last stitch. This part is important! Every stitch needs to be as close together as possible, to span the whole space. Fill it in with no gaps of fabric visible between stitches. Continue this until one half of the shape is filled. -
 06Flip It
Once you finish, just flip to the back of your work and weave the thread under the stitches you've already created. Poke the needle back through to repeat the process on the other side. This way, the thread will be hidden. -
 07 Complete the Stitch
Complete your final stitch and weave the thread through again to hide it. -
 08 Cut It
Snip only the end you were just working with, leave the tail you created at the beginning. -
 09 Thread Through
Thread the original tail through your needle. -
 10 Weave the Tail
Weave the tail through, back and forth a couple of times until it's almost all gone and snip off the end! Done! -
 11 Repeat
Now you can use this method to fill in the entire design! I added some extra little stitches here and there for the cactus spikes using white thread. I used pink thread and applied the satin stitch again for the cactus flowers. -
 12 Make it your own
You can customise this method and make it your own! Stitch onto knitted fabric, just like I did to create this rainbow or make any shape you like. Have fun!
 01You will Need
 02Starting Your Design
  03Draw and Thread
 04Satin Stitch
 05Stitch Across
 06Flip It
 07 Complete the Stitch
 08 Cut It
 09 Thread Through
 10 Weave the Tail
  11 Repeat
 12 Make it your own
Don't forget to comment below for your chance to win this set!
It‘s all about rainbows isn‘t it.
i could never do this… it‘s so cute and we don‘t have beddings for our dollhouse.
What a great blog post. Definitely would love to have one of these.
Ughh I must have this!! My girls would love it!