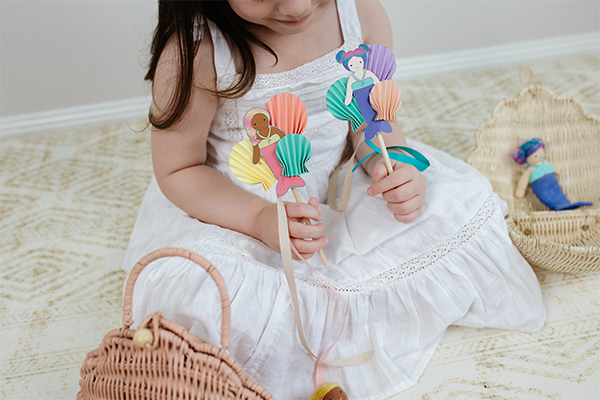
Dive in, we’ve got a most magical DIY featuring our new Holdie™ Mermaid friends, Isla, and Marina. We teamed up with our favourite friend Kathryn of @cardboardfolk to create this upcycled Holdie Mermaid wand using the beautiful gift box all Holdie Folk arrive in! This DIY includes an easy peasy step-by-step guide and is the perfect craft for little hands to help and play with!
~It’s craft time!
Make your very own DIY Holdie™ Mermaid wand.


Watch video below for extra guidance!
-
 01GET STARTED
Remove the sleeve from your Holdie™ Mermaid box and carefully cut out the mermaid illustration from the front with scissors. -
 02Cut & Trace
Use a round object to trace a semi-circle around 10cm in diameter onto the coloured paper with the pencil. Cut it out using scissors. -
 03Fold
Fold the semi-circle in half horizontally, then accordion fold one half of the semi-circle. Turn the project over and accordion fold the other half. -
 04Pinch your Shell
When the semicircle is completely folded, pinch the bottom of one side and fold it out. Repeat for the other side and then fan out the top slightly to create the shell shape. -
 05Repeat Repeat Repeat!
Repeat steps 2-3 to create a total of 3 shells in different colours. We made one of our shells slightly smaller than the others. -
 06Assemble with love
Arrange the 2 large shells behind the mermaid illustration and the smaller shell on top. When you are happy with the design, glue it in place. Tip: If you’re using white glue, some double-sided tape will help hold the pieces in place while the glue sets. To speed up the drying time, have an adult use super glue or hot glue instead. -
 07Stick & Ribbon
Grab your stick and glue the ribbon to the top. We used 2 different colours and cut the stick down to fit inside our Shell Bag!
-
 08Voila !
When the glue on the mermaid and the ribbons has set, attach the mermaid to the top of the stick with your choice of glue, ready to create some Mermaid Magic!
A pocket sized world of imagination awaits! The perfect Magical wand for your Shell Bag and Holdie™ Mermaids.

 Welcome to Olli Ella!


